The Best Toys for Blind Kids and Where to Find Them
This post may contain affiliate links; please see our terms of use for details.
We all want to find the best toys for our kids, but when your child is blind, where do you start? In this toy guide, you will learn how to find the best toys for your child’s needs, including what to look for in off-the-shelf toys and how to adapt or make your own toys so they are perfect for your little one. We’ll also look at how to create an adaptive play environment or sensory play space and how to use these toys to facilitate learning.
Below you will find:
- Why Play is Important
- How to Use Playtime to Facilitate Learning
- How to Choose the Best Toys
- Where to Find Accessible Toys
- How to Adapt Toys
- How to Make Your Own Toys
- How to Make a Sensory Play Space
- Some Toy Ideas & Suggestions (Our 12 Favorite Toys!)
- Adapting Activity Kits for Kids with Special Needs (Our 6 Favorite Kits!)
Why Play is Important
If you think about it, a child’s job is to play so they can learn and develop through play. Early learning is especially dependent on play and often based on the senses and actions (babies learn by observing, touching and doing). This is also true for older kids with developmental disabilities. Interacting with the world through play is a great way to learn!
Playtime allows a child to learn and gain many skills:
- Motor skills
- Memory
- Problem solving skills
- Communication skills
- Concept development
- Social skills
- Self-confidence
Playtime is also a time when a child can do things on their own in their own way. There’s not necessarily a “right way” to play! Let your child explore or play on their own terms and develop their own rules. It’s not always best to “do” for your child. If you can sit back, sit back. Of course, you’ll probably have to facilitate your child’s play (and depending on your child’s needs, you may have to facilitate a lot), but the less you can do, the better.
It’s also good to keep in mind that some kids just play, it just comes naturally to them. For other kids, however, and most often for kids who are blind or disabled, play needs to be taught. It’s like sleep. Before I had a baby, I thought sleep was natural. Then I learned that I had to teach my son how to sleep! Similarly, I’ve also had to teach Ivan how to play and encourage him to play on his own independently.
And another thought about play: Beware of self-stimulation. I asked an Occupational Therapist (OT), “Since play is so valuable, is there any such thing as non-constructive play?” Her response: “When it’s stimming.”
If your child is playing independently, but immediately reverts to rocking, flapping or hitting themselves, you need to be there to redirect their attention back to the play.
There are different kinds of play that build in layers as children develop:
- Interpersonal: playing peek-a-boo or tickles with mom or dad. This type of play is usually body on body and face to face.
- Exploratory: Learning to interact with objects (i.e., toys) and explore them.
- Functional play: Kids realize that objects DO things and they begin to use toys “appropriately.”
- Constructive play: Building blocks or constructing using legos. This is also where crafts and creativity may develop.
- Symbolic play: Playing pretend and creating scenarios.
- Games with rules
The toys and activities we’re discussing here fall mostly under exploratory, functional and constructive play.
How to Use Playtime to Facilitate Learning
Playtime is learning time for babies and young children. This means that playtime can be used to encourage development and learning, but it also means that learning time should be fun!
Below are five tips to keep playtime fun while also facilitating learning:
- Find the “just right” balance when playing with your child and choosing toys. You want to challenge your child while also not letting them get too frustrated so they can learn while having fun.
- Try to offer play opportunities that encourage problem solving. This can be as simple as placing a bracelet on your child’s wrist and then letting them figure out how to get it off.
- Keep toys close and predictable, always in the same spot and always within reach.
- Give lots of opportunity to repeat an activity so that your child can learn what to expect during play.
- Use your daily routine as a way to incorporate playtime activities (like playing in the kitchen while you make dinner, for example).
How to Choose the Best Toys
You have two basic options when choosing toys for your child: You can go with what makes your child comfortable or you can push them outside their comfort zone. Both are important!
- Inside the Comfort Zone: Watch how your child responds to toys and try to pick toys that are preferred. If they like soft objects, go with soft toys. It’s helpful to keep your child comfortable when first getting them to interact with toys so you can focus on playing and not on overcoming other obstacles. Many kids who are blind have aversions to certain textures (my son hated anything that was soft or sticky), so start out with what they like. This will also help encourage independent play.
- Outside the Comfort Zone: But you also want to push your child beyond their comfort level so they can have broader experiences as they grow. Promoting experiences can help overcome aversions, so constantly repeating exposure to a non-preferred texture can help your child become more comfortable with that texture. Check out our article on Ivan’s sticky box for more tips on overcoming aversions.
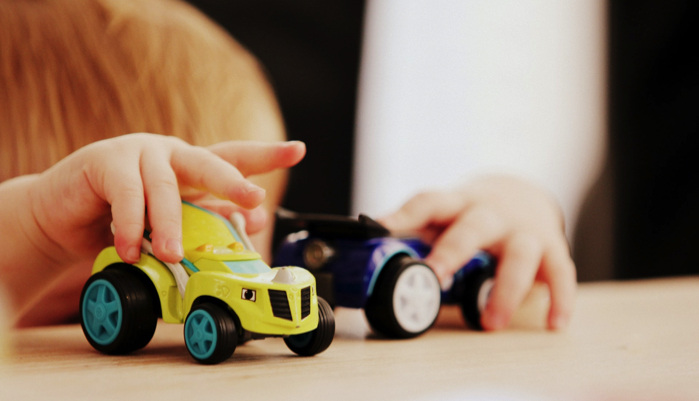
Remember that kids who are blind will often not use a toy “as intended.” A plastic truck might become a chew toy, a stacking cup might get thrown. Help your child explore and discover the various ways to play with a toy with lots of modeling and facilitation.
Need more ideas on how to choose the best toys? Check out this list of 10 Questions to Ask When Purchasing a Toy for a Child who is Blind.
Where to Find Accessible Toys
You can purchase specialized toys, but they are expensive and often only perform one task. They might also be so focused on one function that they don’t really encourage social play. We’ve actually found that purchasing toys through mainstream outlets is cheaper, easier and the toys are often already accessible to kids who are blind (or only need slight adaptations).
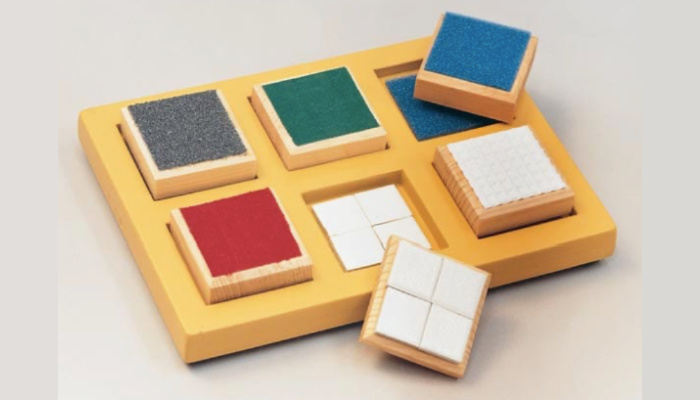
For example, you can purchase these Textured Matching Blocks from APH for $72.00.
Or this similar “mainstream” Touch and Match Board on Amazon for much less.
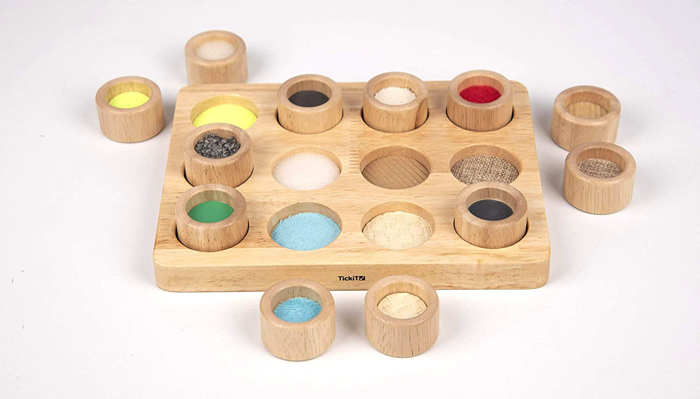
We’ve owned both, so I can also say that the mainstream toy is better constructed and the pieces easier to hold.
Below are some places you can visit to find toys, both specialized and mainstream:
| Specialized Toy Outlets | Mainstream Toy Outlets |
|---|---|
| APH | Amazon |
| TFH Special Needs Toys | Target |
| Fun and Function | Walmart |
| Adaptivemall.com | Toys “R” Us Special Needs |
| Playability Toys | Discovery Toys |
| Melissa & Doug | |
| Lakeshore Learning |
How to Adapt Toys
Many mainstream toys are actually already quite accessible right out of the box, but some can use a little help. Here are a few ideas to make toys more accessible for your child:
- Add braille: If your child is learning braille or you expect them to be a braille reader when they get older, then add braille to everything! You can get clear sticker paper and create your own braille stickers with your brailler so you can add braille letters to alphabet toys or braille labels to buttons on other electronic toys. You can also get braille alphabet Feel ‘n Peel stickers from APH.
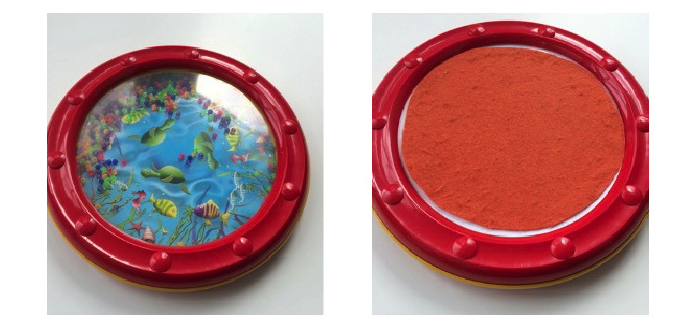
- Add textures: We’ve added textures to toys so that Ivan can tell which side is up and which side is down (when a flat toy, for example, feels smooth on both sides) or just as an added sensory component to a toy. It’s really easy to glue felt or other fabric to a plastic toy.
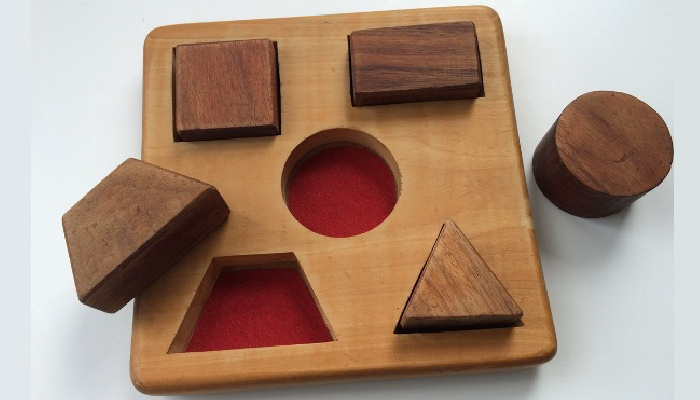
- Add colors: If your child has vision, try to find toys that have clear, high-contrast colors. But, keep in mind that you can always add your own color, too! For example, if you have a puzzle board, you could add colorful felt to the bottom of the cut out so that it’s clearer to your child where each puzzle piece should go.
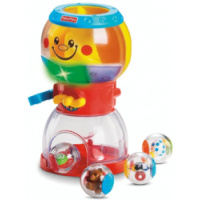
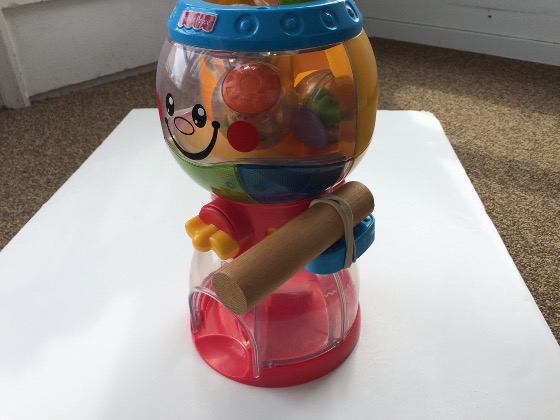
- Make buttons bigger or easier to find: Use braille or fuzzy stickers to mark buttons on electronic toys. You can also add an extender to a lever. For example, we attached a wooden cylinder block toy to the lever of Ivan’s Fisher Price Gumballs Toy with a rubber band to make it easier for him to push the lever and play with the toy (this is a favorite toy, by the way).
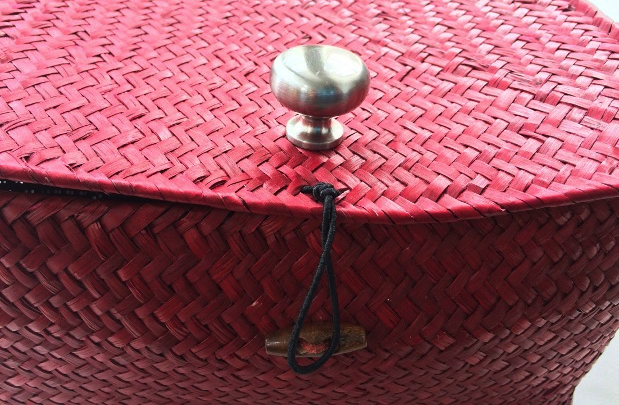
- Add handles: If your child needs help in picking things up or getting something open, add a handle! It’s really easy to screw on an inexpensive drawer pull to the top of a box or to a wooden puzzle piece. Now your child can get a better grip on the toy!
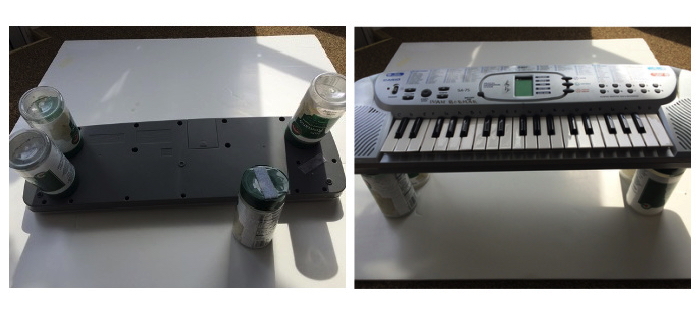
- Add props: If your child will be playing with a toy laying or sitting down rather than standing, see if you can find ways to prop the toy up for them. We’ve added “legs” (they’re really parmesan cheese containers) to the bottom of Ivan’s piano so he can sit with it across his lap. You can also attach an empty Kleenex box to the back of flat toys so that they will prop up for kids who play when laying on their sides.
How to Make Your Own Toys
Making your own toys is actually easier than you might think, especially if you keep it simple. Here are some ideas for homemade toys, many of them made with items you can probably find in your recycle bin!
- Scented Rattle: For this toy, all we did was punch holes in the top of a Gerber juice container (or you can use a cleaned-out spice container as well) and added objects with scents, such as cloves, allspice or cinnamon sticks.
- Stackable Sound Blocks: This is another Gerber find. Clean out plastic Gerber baby food containers and fill with items that make different sounds, like dried rice or beans, bells or soft pom poms. Seal the containers closed with hot glue and stack them!
- Bead Container: Clean out an old Gerber baby cereal container and fill with a bead necklace that has been cut (so it’s a long string of beads). Have your child pull the beads out of the container. It makes a great sound and also encourages your child to hold the container with one hand while pulling with the other.
- Tactile Matching Game: This game is made with recycled apple sauce containers. Glue a cupcake cup into each container and then glue a tactile item (like dried pasta, a Christmas bow or sea shell) to the bottom of each container. Make two of each and you’ve created a simple tactile matching game!
- Sponge Ball: Cut two sponges into strips then tie them together. This ball is light and fun to throw and squeeze. Plus, it also makes a great bath toy!
- Shoebox Pegboard: Poke holes in a shoebox and use golf tees as your pegs. You can glue colorful cardstock to the top of the pegboard to increase the color contrast.
- Lid Matching: This is a super simple game. Three containers and three lids… now which goes with which?
- Clothespin Activities: There are a variety of ways to turn clothespins into games, and all of them are great for improving hand strength and fine motor development. You can add complexity to the games by having your child match colors or textures.
- Velcro Bottle: Add Velcro to small wooden blocks and to the outside of a large plastic bottle. Have your child remove the blocks and place inside the bottle for a satisfying sound!
- Feed the Monster: Turn your old wipe container into a monster (this can be a fun craft to do with your child) and have them insert “food” made from cardboard cutouts.
- Scarf Pull Toy: This one is so easy you’ll wonder why you haven’t thought of it before (or maybe you already have)! Just stuff a silky scarf into an O-Ball and have your child pull it out!
How to Make a Sensory Play Space
Children who are blind or deafblind often remain restricted in their movement and use of space. A play space can encourage children to reach, explore and develop spatial awareness.
The basic idea behind a play space is that you create a predictable environment where your child can manipulate toys and feel free to explore. A play space can be small (like a small box or corner in a room), it can be part of your child’s everyday space (like a special insert on their wheelchair tray) or it can be big (like a large box they can crawl into or a large area on a wall).
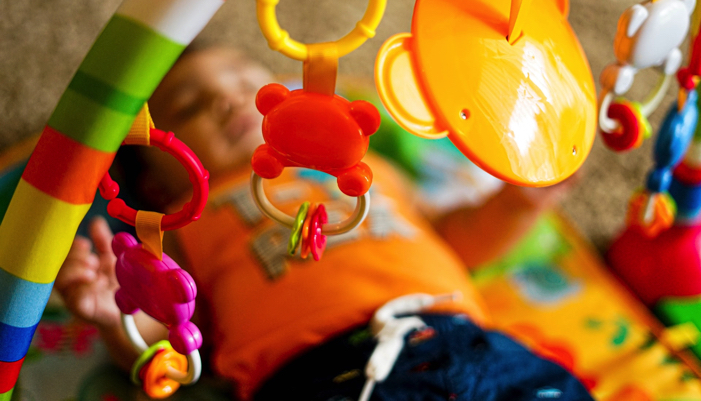
When creating a play space, think about what sort of development you’re trying to encourage. For example, if you want to encourage your child to stand, try creating a wall of toys that they can stand next to and play with. If, on the other hand, you’re trying to encourage your baby to reach out and touch things, maybe start with a small box that they can lay in with toys dangling above their head.
You can also create a play space on your child’s body, with play vests or blankets or even by tying an object to your child’s wrists or ankles. This is a great first play space idea for babies!
Below are more play space ideas:
- Make Your Own Sensory Play Area
- Defined Spaces: How to Create Big and Small Playspaces for Children who are Visually Impaired
- Hold Everything! Twenty Stay-Put Play Spaces for Infants, Preschoolers, and Developmentally Young Children with Sensory Impairments and Other Special Needs
- Make Your Own Play Space for Your Blind Baby
- Creating Sensory Activity Centers for Blind Children
- Make Your Own Mini Play Area
Some Toy Ideas & Suggestions (Our 12 Favorite Toys)
With so many toy options, it can be difficult to recommend favorites, especially when each child is so unique in their needs and preferences.
But it’s also hard to talk about toys and not want to share the ones we like the best! Below are some of our absolute favorite toys:
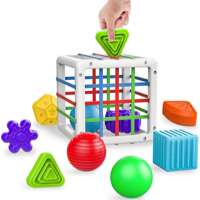
Colorful Cube Shape Sorter: A simple shape sorter that doesn’t actually sort shapes! This toy allows children to explore the shapes and find a way to push them through the elastic straps without having to line the shapes up perfectly.
Fisher Price Roll-a-Rounds Swirlin Surprise Gumballs: Pull the lever and the gumball machine lights up, plays music and a ball rolls out of the bottom of the toy. It’s a great cause and effect toy plus it’s fun to play with in a dark room for kids with light perception.
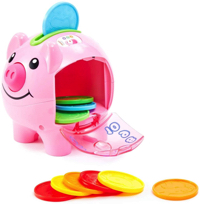
Fisher-Price Piggy Bank: Ivan loves this toy because it counts the coins and plays a little song every time he gets a coin in the slot. I love this toy because he has to turn the coins and get them in just right in order to get the feedback he wants.
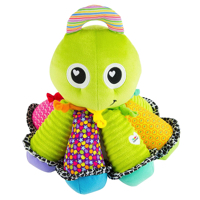
Lamaze Octotunes: This is one of those great battery-free toys. Each arm of the Octotunes plays a different note when you squeeze it. Plus, it smells faintly of vanilla, which is a lovely added sensory bonus!
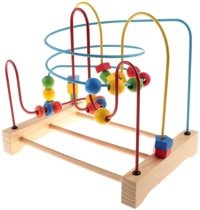
Wooden Bead Roller Coaster: This is a classic that never gets old. The entire toy is contained, so you don’t have to worry about blocks rolling away, and it’s fun for kids to follow the wires from one end to the other.
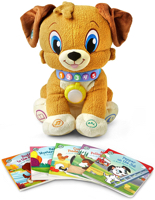
LeapFrog Storytime Buddy: This sweet plush dog barks and responds to touch on different parts of its body. The buttons on the collar also correspond with simple board books (included) that buddy can read to your child. Add braille to the books to make them accessible!
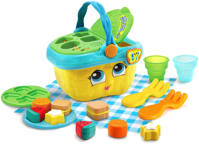
LeapFrog Picnic Basket: This picnic basket is a shape sorter and pretend play toy all in one. Ivan particularly likes that it makes noises every time you open and close the basket.
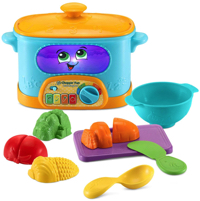
LeapFrog Choppin’ Fun Learning Pot: This is another great pretend play toy. What I like best about it is that it senses when one of the toy food items is dropped in the pot and makes noises to reinforce putting items in and taking them out. I also love that kids can pretend to “slice” the vegetables.
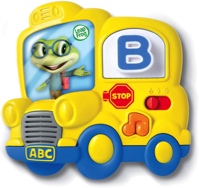
LeapFrog Magnetic Letters: Place a letter in the bus window and you can hear the name of the letter, the sound it makes and a little song. There’s ample space on the back of each letter to also include braille.
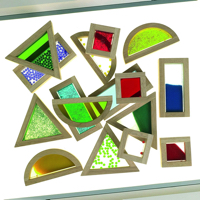
Rainbow Sound Blocks: Each of these colorful blocks makes a sound when you shake them and they also look great on a lightbox!
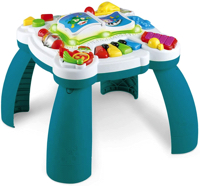
LeapFrog Music Table: Ivan has had this toy since he was a baby and it’s still a favorite! When he was little, we kept the legs on and had Ivan stand or kneel at the table. Now we’ve taken the legs off and place the music table on a table or on his bed and have him stand there. He loves it!
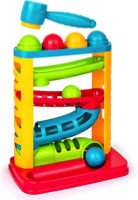
Roller Ball Run: Ivan enjoys placing the balls in the top of the roller run and hearing them fall through the maze all the way down. He also likes that it’s open in the front so he can reach in and feel what is making all the noise!
Adapting Activity Kits for Kids with Special Needs (Our 6 Favorite Kits!)
Toys are great, but so are experiences and that’s what activity kits can offer. We love buying pre-packaged kits that contain everything you need to produce an interactive learning (and playing) opportunity. Activity kits can cover anything from cooking to crafts to science, but our favorites involve hands-on multi-sensory components that are easy to adapt for kids who are blind.
Just like with toys, depending on your child’s needs you may have to facilitate a lot of the activity with hand over hand prompting, but as your child becomes more accustomed to the activity and grows more confident you can try stepping back and letting them do more on their own.
What to look for in an activity kit:
- Textures: If your child has little to no vision, really focus on tactile kits that provide a lot of textures and interesting things to touch. Kits that allow kids to grow or change objects (like crystal growing kits) are great options!
- Baking: Cooking kits for kids are a lot of fun because they usually include really easy recipes with premeasured ingredients and easy-to-follow instructions. And when you’re done you get to eat what you made!
- Simplicity: A lot of kits designed for younger kids are really simple to follow making them easier to adapt to your child’s needs.
- Comprehensive: Most kits will tell you what’s included and what you need to purchase separately. We try to find kits that have most (if not all) components included in the box.
- Accessible options: When looking at an activity kit, think about ways it can be made more accessible to your child. Can you add braille? Add color contrasts? Maybe use a switch to activate a food processor or blender? Could you introduce choice making? Most activities designed for children can be made accessible to meet your child’s unique needs.
One last tip: Open the box and read all the steps before introducing the activity to your child. Make sure you have everything you need ready and prepared. For example, in some baking kits I might chop fresh ingredients ahead of time and have them ready in a small container. If a recipe calls for chopped bananas, I can have Ivan touch a full banana, then show him the pre-chopped banana and he can place the chopped ingredients in the bowl. This way the activity is easier to manage and also prevents any accidents with knives.
If you’re specifically looking for science kits, check out our favorite science activities for kids who are blind. Below are our six favorite activity kits:
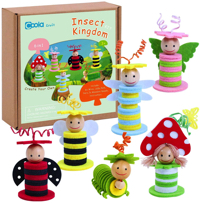
Insect Kingdom Felt Craft Kit: These little bugs are made by stringing felt pieces through craft wires. The parts are easy to hold and there is no glue involved, making it a really easy tactile fine motor activity. You can also talk about how the bugs are getting bigger every time you add a new piece to the design.
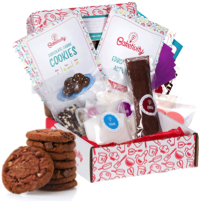
Baketivity Kids Baking Kits: Baketivity is the absolute best! Each kit comes with everything you need to make delicious cakes and cookies (excluding the fresh ingredients like eggs or butter) and everything is premeasured so all you have to do is open, poor, mix and bake. They have a ton of recipes to choose from and each kit also includes educational activities. The company also has a subscription service where you can have a new box sent to you automatically every month.
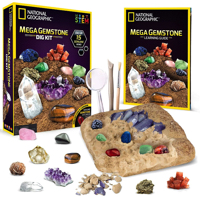
National Geographic Mega Gemstone Dig Kit: This kit gets messy, but if your child is ok with that it’s also a lot of fun! The kit includes a large sand block that hides multiple real gemstones in its depths. All you have to do is get the sand wet and start picking at it with your hands or the included plastic tools to dig and find the stones! National Geographic carries a bunch of different dig kits including fossils, geodes and dinosaur eggs. We love all of them!
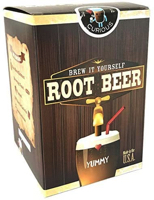
Brew it Yourself Root Beer Kit: Did you know you can brew root beer using yeast? Yes! This is a fun activity that also teaches kids about how carbonation works. It does make a lot of root beer so make sure you are ready to drink a lot or you have friends to give bottles to!
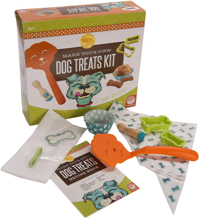
Make Your Own Dog Treats: This is a great baking activity that involves your dog! We love making treats for our dog because it’s so much fun to see how happy she is when the treats are done.
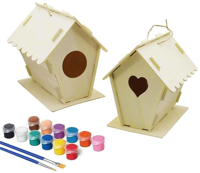
Wooden Birdhouse Kit: These kits snap together, but do require glue to keep the walls in place. The wood is unfinished and can be painted, but we usually decorate our birdhouses with tactile foam stickers since that creates a more interesting texture than paint (glitter stickers are the best). They are nice to hang outside and fill with birdseed, but they don’t last forever. Of course, that just means you get to make a new one when the old ones need to be replaced!
Related Posts
Braille and Literacy, Toys, Visual Impairment
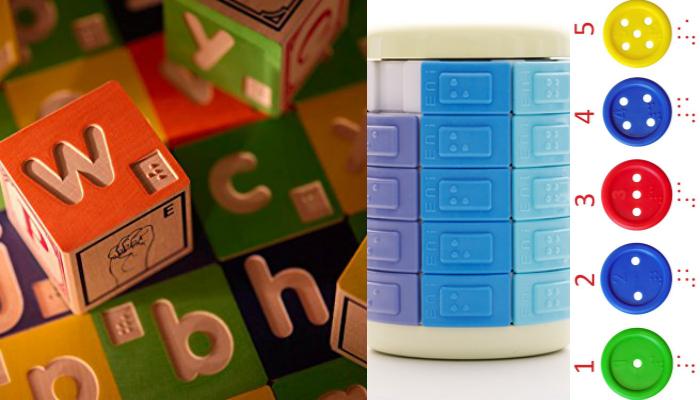
24 Braille Toys for Kids Who are Blind
Everything from alphabet blocks to raised line coloring pages and activity books to puzzles to card and board games... and so much more! And it's all in braille ready for...
Tactile Arts and Crafts, Visual Impairment
Using Origami to Teach Blind and Low-Vision Students Basic Shapes
If, like me, you have wondered why it is important for young students to learn about shapes, here are just a few reasons. Teaching shapes in early education provides children...
Toys, Visual Impairment
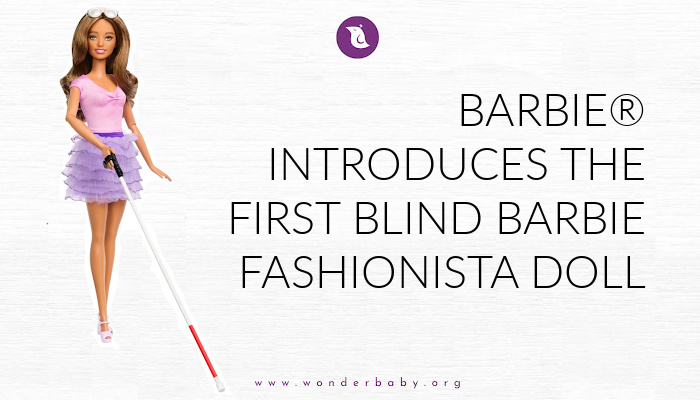
Barbie® Introduces the First Blind Barbie Fashionista Doll
Mattel, in partnership with AFB, announced the addition of a blind Barbie doll with white cane and sunglasses.
